Route: Walla Crag
Area: Central Lake District
Date of walk: 20th September 2018
Walkers: Andrew
Distance: 5.1 miles
Ascent: 1,200 feet
Weather: Light cloud with some soft sunshine, becoming duller later on
Standing at 1,234 feet, Walla Crag is one of the smaller lakeland fells and, as Wainwright points out, its height is easily remembered by anyone who is able to count up to four. It’s a wonderful little fell with various possible approaches, all of them beautiful. I ruled out a longer walk today as rain was forecast in the afternoon, which proved to be the case
I parked in the National Trust car park in Great Wood, and as I did so a large group of 20 or more walkers were booting up and chattering away noisily. I quickly set off in order to leave them behind and followed the path south through Great Wood. In my haste to escape the pack I took the first path to the left, mistaking this for the path up beside Cat Gill, which was my intended route. I quickly realised my error but rather than retracing my steps and encountering the group I decided make a virtue out of necessity and to carry on through Great Wood, approaching Walla Crag via Rakefoot
This is a much longer, but less steep, alternative. After a long gentle climb I emerged from Great Wood to follow a path and a narrow road through Rakefoot, and beyond here I climbed up onto the open fellside above Great Wood, with some lovely views of Skiddaw, Blencathra and Derwent Water
At a prominent cairn I passed through a small gate to follow a narrow path with the steep rock face of Walla Crag close by on my right. A short and simple climb soon brought me to the summit of the fell, from which there are superb views towards Borrowdale looking one way, and Keswick and Derwent Water looking the other. Having savoured these for a while I continued in the same direction and passed by the Cat Gill path, which had been my intended route at the start. The path descends gently in the direction of Borrowdale, with lovely views all the way, and eventually arrives at the well known beauty spot of Ashness Bridge. After taking the obligatory photo here I joined a path signposted ‘Great Wood’ which contours along the fellside above the road to Watendlath
I followed the path back into Great Wood, passing by my earlier ascent path, and from here I retraced my steps back to the start of a great walk
For other walks here, visit my Find Walks page and enter the name in the ‘Search site’ box
Click on the icon below for the route map (subscribers to OS Maps can view detailed maps of the route, visualise it in aerial 3D, and download the GPX file. Non-subscribers will see a base map)

Scroll down – or click on any photo to enlarge it and you can then view as a slideshow

Red squirrel in the garden earlier in the week...

....and today, just before I set off to the start of today's walk

Leaving Great Wood car park (in a hurry, to avoid a large group of walkers)

Without thinking, I turned left here, but the Cat Gill ascent is a little further along - and is less than 1 mile. I quickly realised my mistake, but pressed on - it would be good to vary my usual way up Walla Crag

The path climbs gently up through Great Wood...


Catbells and Maiden Moor through a gap in the trees near the top of the wood

Above the wood now, and a view of Grisedale Pike (right) and the north western fells above Derwent Water

Beyond Rakefoot, looking back along the path to Skiddaw and its Little Man...

...and now looking ahead to Walla Crag

Catbells and St Herbert's Island

I cross this small wooden footbridge

A view back to Blencathra

Keswick

I leave the main path here to follow an unofficial but clear path which skirts the edge of the escarpment

Maiden Moor on the far side of Derwent Water

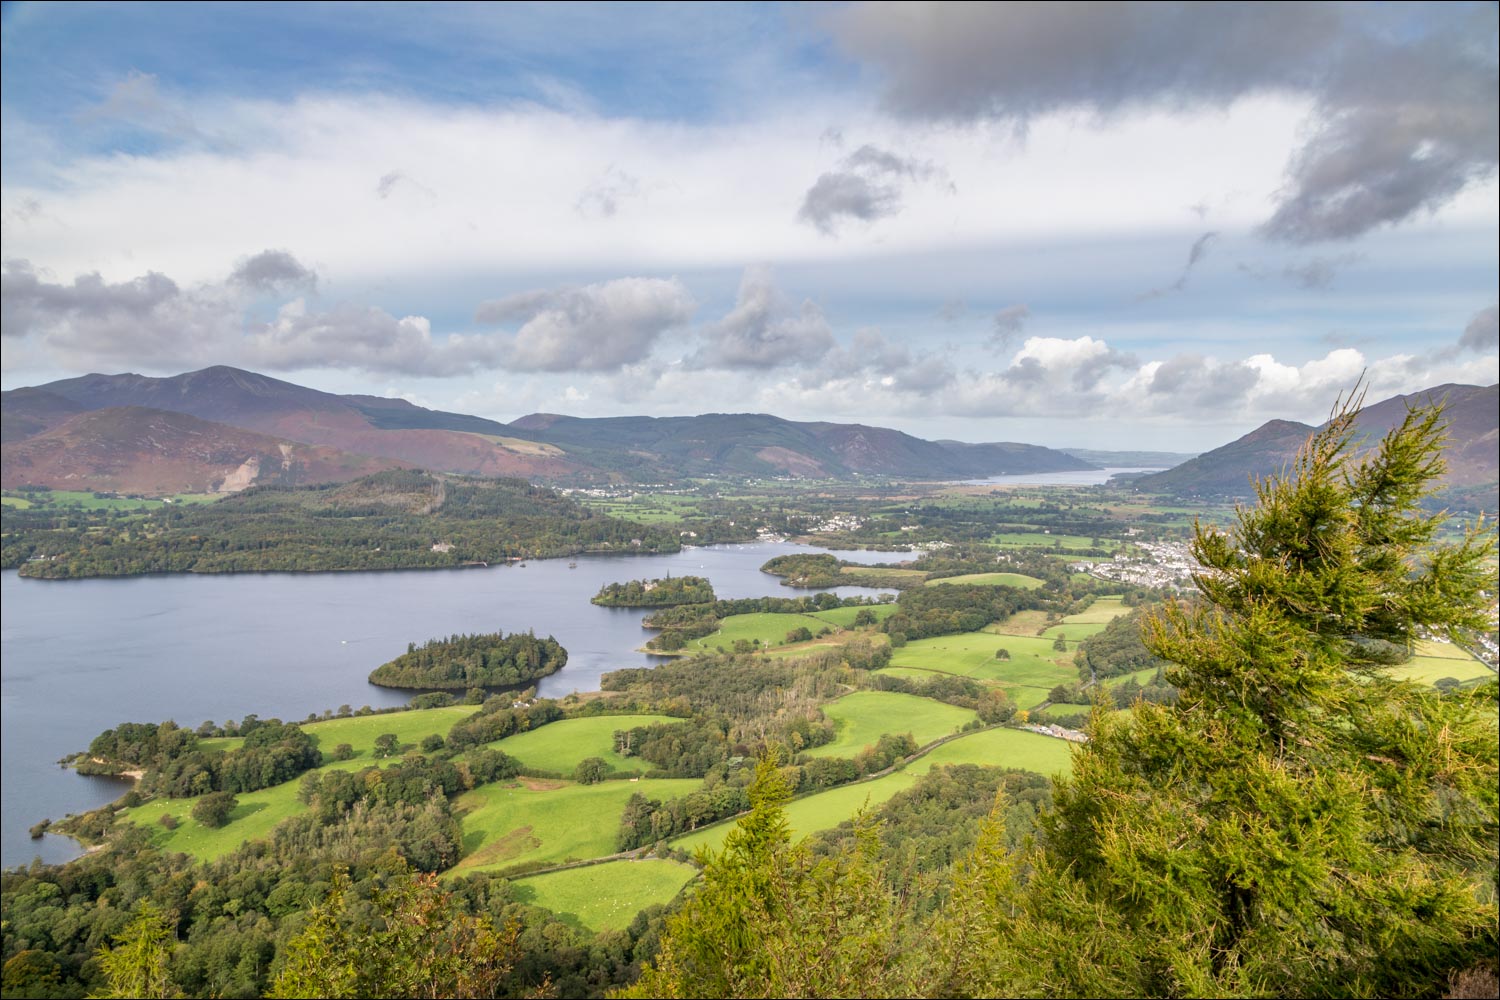
Derwent Water, and Bassenthwaite Lake in the background

I continue to follow the narrow path

Autumn leaves

The rocky viewpoint at the summit of Walla Crag, looking towards Borrowdale...

...and now looking over Derwent Water to Bassenthwaite Lake

Keswick and the Skiddaw fells

Blencathra

I descend from Walla Crag - the inviting path to Bleaberry Fell is on the left, but I'll fork right a little further along

Looking across to Catbells and Maiden Moor

The Jaws of Borrowdale - King's How and Castle Crag

The path to Bleaberry Fell

I pass by the Cat Gill path, which I'd intended to use for the ascent

Catbells and Maiden Moor again

I follow the path across the fellside in the direction of Borrowdale...


Causey Pike and Sail mid-picture

Lord's Island and Derwent Isle (which is inhabited), and Portinscale at the foot of Derwent Water

A wider view

Borrowdale

High Lodore and Grange in Borrowdale

Ashness Farm

I pass through this gate and then turn right at the line of trees before the farm

A small barn or hut by Ashness Bridge

Ashness Bridge, which has been photographed from every angle and in all weathers and seasons, so I just took a quick record shot and moved on, leaving the road after a few yards to take a path on the right

Good views of Derwent Water from the path, although the weather was closing in by now

Signs of autumn approaching...


Possibly a victim of yesterday's Storm Ali, this fallen birch tree forms an archway over the path

The head of Derwent Water

Falcon Crag

I cross Cat Gill at the end of a wonderful short fell walk